PVC card basics · 11 min read
Custom PVC card printing: the complete guide
From a blank brief to a finished batch of cards on the shelf, custom PVC card printing follows a structured workflow with six clear steps. This guide walks through each phase — artwork, proof, production, personalisation, quality control and dispatch — with the practical decisions that shape the outcome of your card programme.
1. The 6-step PVC card printing workflow
Custom PVC card production is a structured industrial process. Every batch of cards goes through the same six steps, in the same order, regardless of whether the project is a small pilot of 100 loyalty cards or a multi-thousand-unit rollout of employee badges. The steps are:
- Define your card programme — volume, use case, encoding, finishing, deadline.
- Prepare print-ready artwork — files, formats, variable data, finish zones.
- Validate the digital proof — written approval before production starts.
- Production: printing, lamination, cutting — the industrial phase.
- Personalisation and encoding — variable data, magnetic stripe, chip, RFID/NFC programming.
- Quality control and dispatch — inspection, packing and shipping.
Standard lead time runs from 6 to 10 working days from proof approval to dispatch, with express options of 2 to 4 working days available on most configurations. The sections below walk through each step with the practical decisions involved.

2. Step 1 — define your card programme
The first step is the brief. A clear brief saves rounds of back-and-forth later and produces a more accurate quotation upfront. The information that matters most:
2.1 card type and intended use
What kind of card is it: loyalty, gift, membership, student, identification badge, magnetic stripe, smart card? And where will it actually be used — a wallet, a lanyard, a hotel desk, a turnstile, a card reader? The intended use drives the thickness, encoding and finish choices.
2.2 volume and deadline
The indicative quantity and the target delivery date. For programmes with phased rollouts (new joiners, seasonal campaigns, academic year), it helps to share the recurring volume early — we can plan capacity and quote the right unit pricing across the full year.
2.3 encoding and reader compatibility
If the card has to interact with a reader, we need to know which one. Reader model, lock system, chip type (Mifare Classic, DESFire, EM Marin, HiCo magnetic stripe), or even a working card to replicate. Mismatched encoding is the single most common cause of post-delivery issues — getting this right at brief stage saves time and money downstream.
2.4 finishing and brand positioning
The finishes available on PVC are gloss or matte lamination, hot foil stamping, spot UV varnish, signature panels, writable cards with adhesive overlay and translucent stocks. Each one carries cost and lead-time implications — see our finishing options reference for the full picture.
3. Step 2 — prepare print-ready artwork
Once the brief is locked, the next step is artwork preparation. Two routes are available: you supply print-ready files, or our in-house design team creates the card from your brand identity. Both routes are priced alongside the print order.
3.1 file format and resolution
The reference file format for PVC card artwork is:
- Format: PDF (preferred), AI, EPS or PSD.
- Colour mode: CMYK for the body, Pantone references for spot colours.
- Resolution: 300 dpi at final printed size minimum.
- Bleed: 3 mm bleed on all four sides.
- Fonts: converted to outlines (or supplied as embedded fonts in the PDF).
- Safe zone: keep critical content (logo, text, photo) at least 3 mm from the trim line.
3.2 variable data files
For per-card variable data (unique numbers, names, photos, barcodes, encoded values), provide a structured CSV or Excel file with one row per card. Column headers should be explicit (member_number, full_name, photo_filename, barcode_value). Photo files are supplied as a linked folder of individual JPEG or PNG images, each named after the corresponding row ID. See our article on variable data card printing for the full data-preparation checklist.
3.3 finish zones on dedicated layers
Premium finishes — hot foil stamping, spot UV varnish, signature panel — require their own layer in the artwork file. Each finish zone is provided as a 100% black mask on a dedicated layer above the CMYK base. This lets the press team isolate the foil and spot UV plates cleanly at production. We share template files on request.
3.4 no artwork yet? Use our design service
If you do not have print-ready files, two design routes are available. Template adaptation: share your brand guidelines and we adapt an existing card template to your identity. Full custom design: our in-house designers create the card from scratch, including photo zones, finish areas and encoding visuals. Both routes include two rounds of revisions and are quoted alongside the print order in a single quotation.
4. Step 3 — validate the digital proof
Once the artwork is ready, we prepare a digital proof — a high-resolution PDF showing your design on the chosen stock with all finish zones identified. The proof is sent to you by email at no charge before any production starts.
4.1 what to check on the proof
- Spelling and content: every word, every number, every logo placement.
- Variable data sample: a representative sample of personalised cards (photo crop, name length, barcode reading).
- Finish zones: the position and size of foil, spot UV, signature panel areas.
- Bleed and safe zone: nothing critical too close to the edge.
- Brand colours: Pantone references applied where specified.
- Card orientation: front and back content correctly placed.
4.2 limitations of the digital proof
A digital proof shows layout, content and structure. It is not a colour reference — screen rendering depends on your monitor calibration, and a JPEG of a PVC card never reproduces the final material exactly. For colour-critical projects (cosmetics brands, premium retail, regulated identity programmes), a contractual hard-copy proof can be quoted separately. The hard-copy proof is printed on the actual stock with the actual finish and validated as the colour reference for the full production run.
4.3 approval and sign-off
Production starts only after your written approval of the digital proof. Approval is given by signing the proof, replying by email or using the dedicated approval link. Modifications requested after sign-off are possible but may delay the schedule and trigger additional design fees — getting the proof right is worth a careful pass.
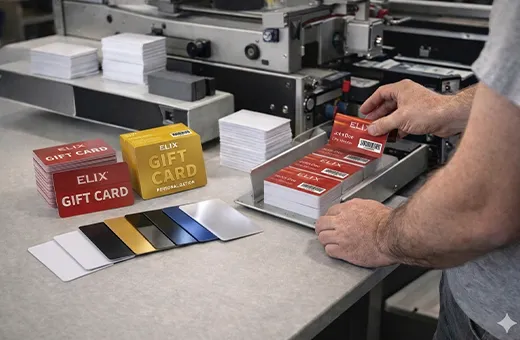
5. Step 4 — production: printing, lamination, cutting
With the proof signed off, the card enters industrial production. Three sub-steps run sequentially:
5.1 sheet printing
The artwork is printed on large PVC sheets — typically containing 21 cards per sheet at the master format. We use offset printing for high-volume runs (best colour consistency and unit cost) and digital printing for smaller batches or variable data jobs. Pantone spot colours are applied at this stage when required for brand-critical projects.
5.2 lamination
The two printed PVC sheets (front and back), the opaque core layer, the two protective overlay films and any encoding layers (magnetic stripe, RFID antenna, chip module) are stacked and fused together under heat and pressure. This is the step that creates the rigid multi-layer composite card body. The lamination cycle is precisely controlled — too much heat warps the card, too little and the layers do not bond properly.
5.3 die-cutting
Once the master sheet is laminated, individual ISO 7810 ID-1 cards (85.6 × 54 mm) are die-cut out of the sheet. The cutting die produces rounded corners (3.18 mm radius) in the same operation. Cutting tolerance below 2 mm is the industry standard for conforming production.
5.4 finishing operations
Premium finishes are applied after die-cutting. Hot foil stamping is pressed onto specific areas under heat. Spot UV varnish is applied selectively over a matte background. Each finish requires a dedicated press pass and adds 1 to 3 working days to the cycle depending on the complexity.
6. Step 5 — personalisation and encoding
For uniform card runs without per-card variation, Step 4 already produces the finished card. Most professional programmes, however, require some form of personalisation — that is Step 5.
6.1 variable data printing
Unique numbers, names, photos and barcodes are printed on each card from the supplied CSV or Excel data file. Modern digital presses handle variable data at high speed without compromising print quality. Photo personalisation requires a 300 dpi source file per card, named after the corresponding row ID in the data file.
6.2 magnetic stripe encoding
Cards equipped with a magnetic stripe are passed through an encoding station that writes the per-card data onto the stripe. HiCo (2750 or 4000 Oe) is the durable, permanent encoding option for hotel keys, transport and banking. LoCo (300 Oe) is rewritable and suits cards that need to be re-encoded — gym day passes, library cards, temporary access. Encoding parameters are validated against your reader specifications before production.
6.3 contactless chip programming
Cards with RFID or NFC chips (Mifare Classic, Plus, DESFire, NTAG, ICODE, EM Marin) are programmed at the encoding station. UID printing, sector key loading, memory initialisation, applet loading and certificate injection are all available depending on the chip family. For high-security deployments, sensitive keys are transmitted through separate secure channels — never in plain text.
6.4 embossed numbering
On magnetic stripe cards, smart cards, membership cards and ID badges, embossed numbering can be applied as variable data: raised cardholder name, member number or unique identifier pressed into the PVC. The classic bank-card style tactile personalisation, applied at this stage of the workflow.
6.5 reader testing
Encoded batches are tested against your reader specifications before dispatch. We replicate the reading environment as closely as possible to catch encoding mismatches at production — not after delivery. The sample size depends on the run volume and encoding complexity.
7. Step 6 — quality control and dispatch
The final step is quality control followed by packing and shipping.
7.1 quality control criteria
Every batch is inspected on a fixed set of criteria before packing:
- Print quality: colour consistency, sharpness, alignment between front and back.
- Cutting precision: within 2 mm of nominal trim, rounded corners clean.
- Encoding readability: every encoded card scanned through the reference reader.
- Finish integrity: hot foil adhesion, spot UV registration, signature panel adhesion.
- Variable data accuracy: photo crop, name alignment, barcode contrast.
7.2 industry tolerances
The following tolerances apply, in line with standard professional printing practice:
- Cutting tolerance below 2 mm on PVC cards.
- Backing white tolerance below 1 mm on transparent or coloured cards.
- Colour variation within Δ ≤ 5 between two production runs of the same file.
- Quantity variation within ±5% of the ordered quantity for technical setup reasons (invoice adjusted to actual delivery).
7.3 packing and dispatch
Cards are packed in member-order sequence when required (sorted by member ID, alphabetical order or tier), or in bulk for uniform runs. Multi-site organisations can request split shipments to multiple offices, branches or properties — each with its own tracking number. Shipping is tracked across Europe and the UK; international dispatch is arranged on request. UK customs and duties are handled in-house — no extra coordination on your side.
8. Production lead times
Standard and express lead times for PVC card printing at Lumacards:
| Configuration | Standard lead time | Express lead time |
|---|---|---|
| PVC cards (loyalty, gift, member, student, business) | 6 to 10 working days | 2 to 4 working days |
| Magnetic stripe cards | 6 to 10 working days | 2 to 4 working days |
| Smart cards (chip programming) | 6 to 10 working days | On request |
| Identification badges | 6 to 10 working days | 2 to 4 working days |
| PVC cards with hot foil or spot UV | 7 to 12 working days | On request |
Lead times start once the digital proof has been approved in writing and the corresponding payment has been received. Late artwork or late proof approval is the most common cause of schedule shifts. Full details on our delivery times reference.
9. Common pitfalls to avoid
Most issues in custom PVC card printing originate at the brief or artwork stage — not at production. The most common pitfalls, and how to avoid them:
- Late artwork delivery — every working day lost between order confirmation and proof approval is a working day removed from your production window. Send your files as early as possible.
- Low-resolution photos — photo files below 300 dpi appear pixelated on the printed card. For ID and member cards, audit your photo source files before sending.
- Encoding mismatch — ordering NFC cards for a Mifare Classic reader (or vice versa) produces a batch that does not work. Share your reader model or a working card at brief stage.
- Skipping the proof — every typo, every misaligned photo, every wrong colour reference catches faster on a digital proof than on a delivered batch. Read the proof carefully.
- Brand colour drift — relying on CMYK alone for a brand-critical colour produces visible variations between print runs. Specify Pantone references when colour fidelity matters.
- Wrong card thickness for the use case — a 0.30 mm card cannot host a chip or a magnetic stripe. A 0.76 mm card is the right choice for daily-use programmes — share your use case in the brief and we recommend the matching thickness.
- Underestimating the data preparation — for variable data programmes, the CSV file alone takes time to clean and validate. Build it in parallel with the artwork, not after.
10. Frequently asked questions
How long does the full PVC card printing process take?
From brief to delivered cards, typical timelines range from 10 to 15 working days for a standard project (1 to 2 days for proof preparation, 1 day for approval, 6 to 10 working days for production, 1 to 3 days for shipping). Express options compress production to 2 to 4 working days. The clock starts after written proof approval and payment, not at order placement.
What file format do you accept for PVC card artwork?
Print-ready PDF is the reference format. AI, EPS and PSD are also accepted. Files should be in CMYK at 300 dpi with 3 mm bleed and fonts converted to outlines. Spot colours should be specified as Pantone references on a dedicated layer. Template files are available on request.
Can you design the card if i don't have artwork?
Yes. Two routes: template adaptation from your brand identity, or full custom design from scratch. Both include two rounds of revisions and are quoted alongside the print order in a single quotation. The design service typically adds 3 to 7 working days at the start of the workflow before the proof is sent.
How do i supply variable data for personalised cards?
Variable data is supplied as a structured CSV or Excel file with one row per card and explicit column headers. Photo files are supplied as individual JPEG or PNG images at 300 dpi minimum, each named after the corresponding row ID. We share template data files on request.
How do you handle GDPR-sensitive variable data?
Variable data containing personal information (names, photos, employee numbers) is processed under a GDPR-compliant workflow. Files are transferred over secure channels, used exclusively for card production, and either deleted or anonymised after the project unless contractual retention is requested. A data processing agreement (DPA) can be signed for projects with sensitive data.
Can i order a sample card before placing the full order?
For colour-critical projects, a contractual hard-copy proof can be quoted before going to full production. The hard-copy proof is printed on the actual stock with the actual finish and validated as the colour reference for the production run. Standard digital proofs are always included free of charge with every order.
What happens if there is a quality issue on the delivered cards?
Any quality claim must be sent in writing within 10 calendar days of delivery, with photographs and the order reference. If the claim is justified, we offer a partial or full reprint, or a commercial gesture on the invoice. Full claims procedure in our terms and conditions.
Can you produce a reprint of the same design later?
Yes. Project files (artwork, encoding parameters, finish specifications) are kept on file. A reprint can be launched as a follow-up order without going back through the design phase — particularly useful for monthly new-joiner runs, seasonal refreshes and replacement cards.
11. Next steps
The fastest way from "I have a card programme in mind" to "we have a clear quotation and a production schedule" is to share your brief through our quote form. Most qualified requests receive a tailored quotation within one business day.
For a deeper dive into the technical decisions involved, our related articles cover thickness, sizes, finishes, pricing and recyclability. The full series is built to answer every question a B2B procurement or marketing team typically asks before placing a first custom card order.
Related articles
Talk to a custom card specialist
Ready to start your PVC card project?
Share your brief — quantity, intended use, encoding needs, finishing and deadline — and our team will reply with a clear, itemised quotation and a production schedule aligned with your launch.